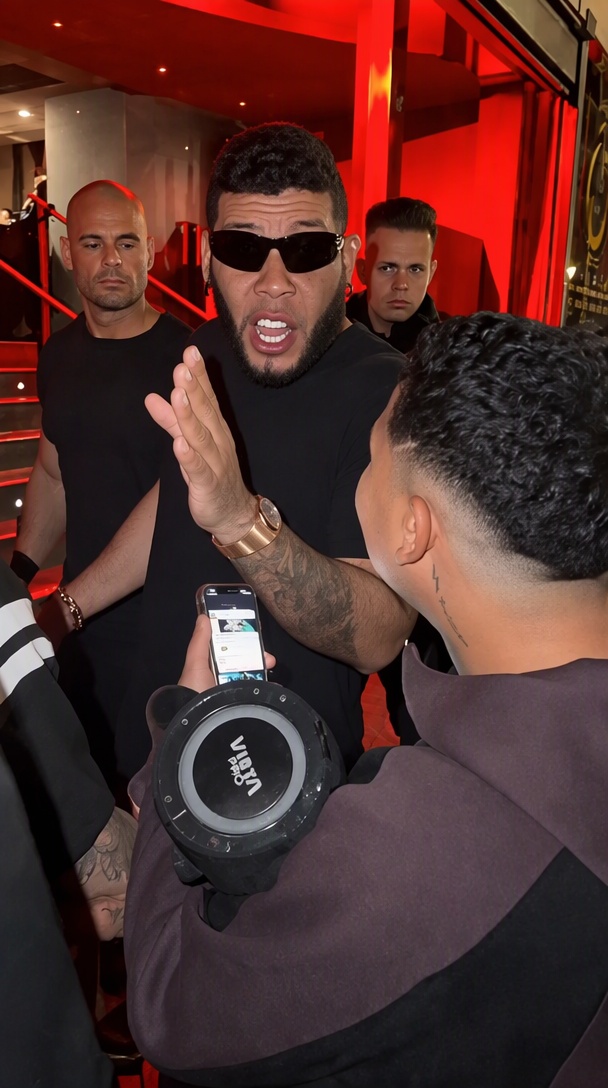
Which should you choose?
Start with a prepared template if you want to add a portrait to a familiar freestyle setup without writing detailed instructions. Choose a manual reference-and-prompt workflow if you want to select the clip, describe the target performer and adjust the setup yourself. You will need a tool that supports those inputs.
A template is a prepared workflow. A prompt is an instruction. Neither guarantees that every face, finger or background detail will remain correct.
Compare the two routes
| What you decide | Prepared template | Manual reference + prompt |
|---|---|---|
| Starting material | One portrait; the performance setup is supplied. | A portrait, a permitted reference clip and a compatible generation mode. |
| Main task | Choose the right photo and check the result. | Choose inputs, identify the replacement target and write instructions. |
| Performance | Set by the prepared template. | Guided by the reference; control depends on the tool. |
| Custom scenes | Only if the template offers that option. | May be possible with an appropriate tool; requires more setup. |
| Sound | Check what the template actually includes. | Check retention or add permitted audio separately. |
| What to review | Identity, hands, clothing, roles and sound. | The same checks, plus whether instructions were followed. |
| Our current preview | Local photo selection and reference playback. | No custom prompt or reference upload. |
The template route: start with the person
A useful template removes repeated setup decisions. You choose a portrait, check the intended performance and review the resulting video. It is a good fit when the familiar freestyle is the reason you are making the clip.
- Choose a recent portrait with a clearly visible face.
- Confirm who should become the lead and what the template includes.
- Review movement and audio before sharing.
The manual route: start with compatible inputs
Check that your chosen tool accepts both an appearance image and a performance reference. An image-to-video mode and a reference-video mode can offer different controls. Read the selected mode’s requirements before preparing the clip.
- Use a reference excerpt you have permission to edit.
- Identify the lead by role and visible position; avoid vague instructions such as “replace him.”
- Describe which people and objects should keep their roles.
- Choose duration, frame shape and audio settings that the mode actually supports.
A starting prompt for a reference-based workflow
Use the example below to organize your instructions. Adapt input names and controls to your selected tool; results depend on the model and inputs. This tool uses a prepared template and does not accept custom prompts.
Use the supplied portrait as the appearance reference for the lead performer. Use the supplied performance clip to guide the order of gestures, body rhythm and camera movement. Keep the speaker holder and surrounding people in their existing roles. Keep the lead recognizable through turns and foreground overlaps. Do not add a second lead or new scene. Use the supported vertical format. Check audio support separately.
Add details only when they resolve an ambiguity. For example, say which figure is the lead, rather than asking for “the whole scene” to change. Repeatedly adding stronger wording cannot compensate for an unsupported input mode.
What if you only write a text prompt?
Text can describe a lively rapper, a crowd and red lighting. It does not, by itself, specify the exact gesture sequence, camera movement or timing of an existing clip. If recognition of the Bulin 47 performance is the goal, choose a prepared template or a compatible performance-reference workflow.
What to check when a result looks wrong
- Wrong person changed: identify the lead separately from the foreground speaker holder.
- Face changes during a turn: use a clearer appearance reference and inspect overlap frames.
- Clothes flicker or hands distort: review the entire movement, not only the opening frame.
- Audio is missing: check the mode’s sound settings rather than adding more visual instructions.
- Lip-sync feels off: verify audio timing; visual reference instructions do not guarantee synchronization.
These checks can help you review a result; the best adjustment depends on the model and input. Use the full playback checklist →